Monday, September 3, 2012

Hat Number THREE !!!

OK, here we go again!  On the right you see Hat #3 for W8TN on the Swains Island trip.  I was able to purchase this one in the hotel gift shop after breakfast for only 30% more than I paid yesterday.  It is exactly the same style as the one I bought yesterday at Walmart.  Let's hope I have better luck holding on to this one.

All but one of the NH8S team was at breakfast.  Craig, K9CT, has extended our checkout time until 1 pm so we will all meet in the lobby at that time and have a team meeting before taking the shuttle to the airport.

We are scheduled to arrive in American Samoa at 9:25 pm local time tonight after a 5-1/2 hour flight on a Boeing 767.  This will be 4:25 am Eastern time tomorrow.  We will go straight to the hotel and will be up at 7 am local time for breakfast and then off to the boat.  All the team is in high spirits and we hope to be able to get on the air very quickly from Swains Island.

At breakfast Craig, K9CT, announced that an instant LoTW upload (after the completion of the DX'pedition) would be made for all those who made a donation to our operation.  I will send him a list of all the WVDXA members who donated as soon as I return in 3 weeks.  DX IS !

Sunday, September 2, 2012

Touring Pearl Harbor

 I went to bed at 9:15 pm local time last night.  I had been up continuously for 24-1/2 hours.  Had some foot cramps that kept me awake for almost 2 hours but finally did get to sleep OK.  Got up at 6 am, showered and met 7 other team members, including Hal, W8HC, at a little after 7 am in the lobby.  We took a city bus to Pearl Harbor to tour the Arizona Memorial and the USS Missouri.

On the Arizona Memorial, I leaned over the railing to take a photo of the oil that is still leaking out of the USS Arizona and a gust of wind blew my high-tech Outdoor Research hat into the water!  As the specs for the hat said it would do, it floated serenely on the ocean.  In the photo at the left-above you may be able to enlarge it by clicking on it and see, over the point of my shoulder, the hat floating toward the white mooring station for the USS Vestal.  Last seen, the hat was headed in the direction of the mooring station for the USS West Virginia!

Once we had returned from the Arizona Memorial, I went to the gift shop and purchased the hat you see at the right.  Not a wide-brimmed model like the one I lost but a fitting replacement.

We then toured the USS Missouri for quite some time, ate lunch at the aircraft museum, and made our way back to the hotel by 2 pm.  Contrary to what Jim, K4JWA, posted on the WVDXA reflector, I did not forget my underwear!  I am however about to head out to some shops to look for a few souvenirs because the duty free shops on Swains Island closed quite some time ago and I will need to make those purchases here in Hawaii.

The remainder of the NH8S team have now all made it to Hawaii (except for the two that are on American Samoa) and we will be leaving tomorrow for American Samoa.  Keep the bands hot until we get on the air!

UPDATE:  Tonight I took "The Bus" for a 45 minute ride to Waikiki to visit a Walmart.  I was looking for some souvenirs and some more mosquito repellent.  Plus, I wanted to get a replacement for the hat I lost.  Short story, I bought the hat - but by the time I got back to the hotel, I had lost it ! ! !  It looks like I'm snakebit on the hat issue on this trip!

Saturday, September 1, 2012

W8TN is in Hawaii

The photo at the right shows W8TN outside the baggage claim area at Honolulu International airport.  You should be able to verify that by looking at the traffic sign above my head.  We landed at 9:34 pm EDT.  Of course, that is 6 hours earlier here in Hawaii (3:34 pm local time.). I'm squinting a bit as I'm looking right into the sun.  Temperature here was 86-degrees when we landed and there was a 15 to 25 mph breeze.

As I write this, I am relaxing at my hotel before joining the rest of the group and several KH6 hams for dinner in an hour.  Hal, W8HC, is still in the air on his way here but I hope to see him at dinner.

None of my luggage had any problems with TSA, nor did I.  Arnie, N6HC, and I flew together from LA and are sharing a room.  Arnie is the team doctor and his medical kit made it here in fine shape.

After resting up for a couple of days here in Hawaii, I'll be refreshed and ready to continue the travel to Swains.  Looking forward to working ALL the WVDXA members so warm up the ionosphere for us!

Thursday, August 30, 2012

Packing for NH8S

As I type this Post, it is exactly 42 hours before my plane leaves Charleston airport.  Time is truly getting short!

GOOD NEWS!  The Swains Island DX'pedition has been informed that we will receive a grant of $4,000 from the Colvin Foundation!

DXCC and LoTW  Today we were notified by ARRL that NH8S has been approved for DXCC and for Logbook of the World (LoTW.)  That is great news!

On a personal front, I'm working feverishly to get the last few items staged and packed for the trip.  As you can see in the photo at the right, I have packed my WVDXA Jacket in case it gets chilly (uh, huh!)  This is a photo of what will be my "Checked" bag.  I'm looking at a $25 "Checked Bag fee" both going and coming for this bag.  I've packed nearly everything inside Ziploc bags on the off chance that the bag might get dropped in the ocean during the transfer from the boat to the island.  That also helps in keeping things organized inside the suitcase.  On the down side, things in plastic bags do NOT stay where you put them.  The arrangement keeps modifying itself according to the influence of gravity.

I hope to be able to relax a bit on Friday (tomorrow) before beginning the Marathon!  I will be up by 3 a.m. on Saturday, my flight leaves at 5:50 a.m. and after a short lay-over in Chicago and one in Los Angeles, I'll arrive in Honolulu, Hawaii at 9:28 p.m. EDT (3:28 p.m. Hawaiin time.)  That means it will take me 15-1/2 hours of flying (and waiting) to reach Hawaii.  The entire NH8S team (those who are in KH6 at that time) are scheduled to attend a dinner at 6:30 p.m. in Hawaii as the guests of some KH6 hams.  That means dinner will be at 12:30 A.M. on Sunday by my personal clock (EDT!)  Assuming it takes 2-1/2 hours to eat then return to my hotel, I'll have been up for 24 straight hours on Saturday.

Thanks to all the WVDXA members for the good wishes and prayers.  Hopefully the ionosphere will cooperate and Hal and I can put every last WVDXA member in the NH8S log.  DX IS!

Tuesday, August 21, 2012

Swains Island Commemorative Tattoo

I thought I'd get a tattoo to commemorate my upcoming trip to Swains Island, NH8S.  I suppose it is something that will cause a bit of confusion to those who are not hams or into electronics but I felt it was appropriate.

Maybe we could make this a club tattoo.  My tattoo artist said he could offer us a group rate.

Note:   I really did NOT get this tattoo.  But, I did think it was a cool idea.

Planning for Medical Emergencies on Swains Island

N6HC at his QTH in California
One thing I have not mentioned before is the need to plan for any potential medical problems on a DX'pedition to a semi-rare location.  On Swains Island there is no local medical facility.  The nearest one is a 23-hour boat ride away - that is, AFTER you get the boat to travel TO Swains Island to pick you up.  Therefore, you are at the VERY least 2 DAYS away from medical help. 

Most DX'peditions these days work hard to find a ham who is also a Doctor to come along as one of the operators.  We are extremely lucky to have Arnie Shatz, N6HC, as our Team Doctor and Operator.  Arnie has operated on several DX'peditions, including K7C-Kure atoll (2005), 3B7C- St. Brandon Island (2007), TX5C- Clipperton Island (2008), K4M-Midway Island(2009), T31A- Kanton atoll, Central Kiribati (2011) and T32C- Christmas Island, Eastern Kiribati (2011).  In addition he is an active contester and very skilled operator. 

W8TN + N6HC in the 2002 ARRL 10-M Contest
As Team Doctor, Arnie has actually "written the book" on what you need to take on a DX'pedition.  His "book" is called Secrets of Dxpedition Doctoring© by Arnold I. Shatz, M.D., FACS, N6HC.  You can read HERE a summary of the medical kit he prepared for the 3B7C operation.  On some of his past DX'peditions he has had to use ALL of the items in his kit but, luckily, has not been faced with any medical conditions for which he was not prepared.

For the trip to Swains Island, Arnie has put together a medical kit similar to that for 3B7C above.  In addition, the group has rented an ACD, Automatic Cardiac Defibrillator, which will also be part of the medical kit. 

When every operator joined the Swains Island team, they were required to supply Dr. Arnie with a questionnaire containing their vital statistics, medical and surgical history, list of all their medications (both prescription and over the counter) plus their allergies to foods and medications.  Each team member was also advised to prepare for motion sickness by obtaining a prescription for their treatment of choice for that malady.  You won't die from sea-sickness but you will be unable to help the team during the first 1 or 2 critical days of setup.  Each team member was also advised to prepare their own medical kit with extra glasses, sun screen, sun glasses, SPF lip balm, bandaids, antibiotic ointments, insect repellant and medications for diarrhea.

Team members were also advised to acquire medical evacuation insurance.  If something severe happens and you need to be evacuated, the cost can easily run into the high tens of thousands of dollars. 

Here at home we seldom prepare in such detail for medical emergencies.  We just figure we can call 911 and get immediate medical help.  That is obviously not the case on a remote DX'pedition.  For this reason, team members and our Team Doctor need to plan for all contingencies and take with us the supplies we may need to keep everyone healthy and safe.

As you can see, big-time DX'peditions to rare and semi-rare locations, just don't "happen" by grabbing some equipment and jumping on a plane.  There are months and even years of planning and preparations that go into pulling off a major DX'pedition.  Without all this pre-operation work (a lot of it by folks who don't even go on the the trip!), a DX'pedition will not be successful.


Wednesday, August 8, 2012

K8RRT Repairs Antennas Damaged by "Derecho" Wind

PRO-57B Going Up
2-L 30-M Going Up
After the June 29, 2012, "Derecho" wind that blew through the eastern U.S., K8RRT had his mast bent severely.  See this Blog Post "K8RRT Wind Damage" for photos and more information.

Today, 8-August-2012, he was able to take down his antennas, replace the mast, install a new rotor and re-install the antennas.  In addition, he added a Hy-Gain VB-66DX 6-element, 6-M yagi to the stack.  The new mast has a .375" wall thickness so it should stand up to the wind from now on.

The photo on the left shows the full-size 2-element 30-M yagi going up to the top of the mast.  This antenna was converted by Charlie, N8RR, from a 2-L 40-M CushCraft that I used to use in Ravenswood.  This antenna, although the biggest in Tim's stack, suffered absolutely no damage in the big wind.  Click on any photo to see a larger image.

The photo at the right shows the Sky Power JLG 600A 4-wheel drive boom lift rented from SunBelt Rentals.  This piece of equipment was the "berries" for removing the damaged antennas and replacing the mast and re-installing the antennas.  It reaches to a height of 60-feet and that was "just enough" to get this job done.
"Helpers" Owen and Grant

"Paul" and "Woody" were the crew from Beam, Inc. of Poca, WV, who did the aerial work.  They were very experienced in doing this type work and knew how to get the job done in the shortest possible time but with quality work.  While they were on a break, my grandsons, Owen and Grant, (at left) checked out the boom-lift.  They were very helpful during the days operations and are learning how to do this antenna work for when Grandpa gets too old to do his own!

Below is a 2-minute video showing the boom lift raising the Mosely PRO-57B from ground level to the top of the tower.  This method of antenna installation is really slick.  Not cheap, but slick.  Tim was pretty much forced to go this route because the wind damage made it nearly impossible to safely remove the antennas from the damaged mast.


     For the icing on the cake, once the antennas were up, Tim ran the coax and rotor control cable through the back door into the shack and made a QSO with D64K in the Comoros.  This was an ALL-TIME New One!  What a way to christen his re-born antenna array!  Congratulations, Tim!

Sunday, August 5, 2012

How to Work NH8S, Swains Island

In working DX, it is one thing to "think" you made a QSO, but it is something totally different to actually get your callsign recorded CORRECTLY in the DX station's logbook.  Especially when there is a huge pileup on the frequency with people tuning up on the DX's transmit frequency, accidental transmission's on the DX's frequency by some stations failing to turn on the SPLIT function, the "traffic cops" that show up, plus the normal QRM and QRN.  It is not enough that you have a loud enough signal to cut through that mess, you still have to LISTEN to make sure the DX station has your callsign correct.

Those stations who LISTEN more than they TRANSMIT are the ones that successfully end up with their call in the log.  They are also those who have no need to make an "insurance" contact, because they were certain their call was correctly repeated by the DX station.  That is not always possible but it is what we should all strive to do. 

Below is the "Band Plan" for the NH8S, Swains Island, operation.  Below that, are the "Guidelines" for getting into our log.  This information is taken from the NH8S web page HERE.  You should READ the guidelines below and FOLLOW them!  That will help insure that the most people possible make it into our log.

Band    CW TX       SSB TX      RTTY TX
 160M     1826.5                          
80
M     3503         3790         3580
60
M    5.405        5.403.5           
40
M     7003         7082         7035
30
M    10103                     10148
20
M    14003        14185        14080
17
M    18079        18140        18099
15
M    21003        21285        21080
12
M    24894        24955        24901
10
M    28003        28485        28080
6
M     50107        50107             

We want you in our log, so please help us by following these guidelines.
  1. If you cannot hear us - please don't call us. Wait until propagation and conditions favor your QTH for one or more of the 11 Bands and 3 Modes. Eventually you WILL have a clear path to Swains Island. Be patient.
  2. Unless you hear otherwise from the Operator, we will ALWAYS be operating in SPLIT MODE throughout the DXpedition.
  3. Listen to the Operator for RX frequencies (e.g., "up 5 to 10", or "listening on 7.155", etc.)
  4. You have two ears and one mouth, so please try to listen more, talk less. Be patient.
  5. During SSB pileups, please announce your full call clearly -- ONCE -- using common phonetics.
  6. During ALL pileups, listen for YOUR call on the comeback. Trust that we have two good ears.
  7. We're not impressed by those who add to the QRM by constantly calling out of turn. Be patient.
  8. Please do not Tune Up on any of our TX frequencies or any of our RX slots!
  9. If we ask for "EU" only or "QRP only" or any other specific request, please QRX. Be patient.
  10. Resist those "insurance" QSOs. We want to maximize unique QSOs, not Dupes.
  11. Whenever possible, we will try to listen in the General portion of the band.
Remember: We want you in our log. Please help us get you there.
 
You will, of course, see us spotted on the PacketClusters.  Some of those spots will attempt to give direction on what NH8S is doing and where we are listening.  Sometimes that is good information but it is MOST important to LISTEN to the NH8S operator and FOLLOW his instructions.  That gives you the very best information on where he is listening and for whom he is listening.

Finally, if you hear Hal or me operating, call all your WVDXA friends and tell them to get on the air so we can personally log all the WVDXA members!

Saturday, August 4, 2012

Antennas on Swains Island

SVDA at K5D
So you think you have a lot of antennas at your QTH?  Well listen to what we will be taking to Swains Island.  NH8S will have two "camps", one for CW and one for Phone, which will be about 1,500 feet from each other.  Each camp will have SVDA arrays for 20, 17, 15, 12 and 10-M.  Each of these consist of two vertical elements for each band.  We will also have single verticals for 30, 40 and 80-M plus two 4-Squares for 40-M and one for 30-M!  The CW station will have at least one V160 Titanex vertical plus a Battle Creek Special.  We will also have 6-M, 10-M and 12-M yagis from InnovAntennas.  And, we will be taking at least 2 Beverage antennas and two Hi-Z 4-square receiving arrays - one for 80-M and one for 160-M. 

Looking at the preliminary antenna layout charts, I figure at least 42 separate vertical antenna elements and yagi antennas, counting yagis as just "1" element and not counting the receive antennas (Hi-Z Four Squares and Beverages!)  These will all need to be assembled, mounted and guyed!  The transmit antennas will be parallel to the water's edge along the beach and the furthest antennas in the line will each be about 200-feet from the operating tent.  That means the line of antennas will be about 400-feet long.  That layout will be the same for both the CW and Phone locations.  Now that's going to take a LOT of coax to connect them all to the operating positions!

If you are not familiar with SVDA (Switchable Vertical Dipole Array) antennas, HERE is a link to a description of Force 12's full size 12-M SVDA antenna.  Have you ever wondered why current DX'peditions that are set up on a beach do not use yagi antennas?  A 2-L vertical next to salt-water, produces a stronger signal up to an elevation angle of about 3° than a 4-L yagi at 100-feet on 20-M!  There is no way for a DX'pedition to put up a 4-L yagi at 100-feet so the dipole is clearly superior.  If you lower that yagi to 70-feet the elevation angle moves up another 4° so the SVDA is KING.  You can look HERE on the Force 12 web site for a full description of what this type of antenna can do.  However, the key to the SVDA working this well is the salt-water so it won't benefit you to put one up here in WV!

The photo above on the left is a set of SVDA antennas in use on the 2009 K5D operation from Desecheo where Garry, W8OI, represented the WVDXA.  Click on any photo to see a larger image.

Once we land on the island, EVERYONE will be tasked with assembling the antennas.  I have a "nail apron" where I will carry a set of nut drivers, crescent wrench, measuring tape, cable ties (Ty-Raps), and electrical tape.  On my belt I will have a Buck knife with screwdrivers, pliers and wire cutters on it.  We will also have antenna analyzers to check out the installations before beginning operations.  I'll also have my water bottle on it's belt and my dual-band Baofeng H.T. for communications.

Something that we don't have to worry with back here is the effect the spray from the ocean has on metal.  A recent post on the top-band reflector by AA7JV said at his ocean side QTH, ". . . any bare metal goes green in less than a week."  You can read the reports on other seaside DX'peditions about problems with antenna and connector corrosion.  Therefore, I plan to firmly tape up each connection I work on to prevent any potential problems.

Friday, August 3, 2012

Getting Ready for Swains Island

Photo: Tim Stinespring, K8RRT
Alrighty then!  Just 29 days from today I'll be boarding a plane in Charleston on my way to operate as NH8S from Swains Island in the South Pacific.  The clock is ticking and I'm frantically trying to get all my ducks lined up and quacking in unison.  This is going to be one HECK of a fun trip!

For those of you back here that will be working NH8S on every conceivable band and mode, here is some helpful information.  We will be using Clublog to upload our logs at least once a day.  If you go to Clublog and search the log for your call, then hover the mouse over each Band/Mode checkmark that indicates your call has been found in the NH8S log, you will see a pop-up of the operator for that QSO.  On the right is the photo that will show up for my QSO's although it will be a bit smaller when you see it on Clublog.

If you have not joined Clublog, you should do so.  It will make it much easier for you to get your QSL after the DX'pedition.  When you join, be sure you "Join a Club" and choose the WVDXA.  I'll get your request and approve you as a member.

Being able to upload the logs from a remote location like Swains Island is not trivial.  We are taking an InmarSat BGAN (Broadband Global Area Network) satellite terminal plus an InmarSat satellite phone and a Iridium satellite phone.  The BGAN terminal rental was $399 for a month plus we need to buy a SIM card at a cost of $1,800 to pay for the additional bandwidth.  The BGAN terminal costs $6 per Megabyte of data transferred.  The two satellite phones cost between $0.95 and $1.70 per MINUTE of use.

In order to reduce our expensive satellite time, an email server will be set up on the island that will limit message size plus batch our outgoing emails so they can be sent at one time every 3 or 4 hours.  That email server costs $140 for a 30-day setup.  As you can see, we have invested over $2,500 in equipment rentals and airtime to provide a secure method of communicating off the island and uploading the logs.  OUCH!

In order to upload the logs, someone has to physically go to each laptop at each operating position (1,500 fee apart,) download the log, then combine all those individual logs and upload them from the satellite terminal.  One of our team here in the USA will then take care of uploading to Clublog.  That process takes a fair amount of time so don't gripe if you don't see an upload when YOU think it should be there.

Over the last few months I've been acquiring various items I will need on this DX'pedition.  At the left are my Seasoft Sunray Titanium zippered dive boots.  This is to protect my feet from the coral when getting into and out of the landing craft and for use on the island.  Some of you may have noticed the headset in my picture at the top of this page.  It's an Arlan Communications Radiosport headset.  A real professional piece of equipment.  I plan to use it on my K-3 after the Swains trip but had to go ahead and get the headset cable and microphone element to fit the Icom IC-7600 radios we will be using.

Speaking of the IC-7600, Jimmy, W8JA, was kind enough to lend me his 7600 to practice on before I go.  That was a HUGE help!  I would have been lost on the island trying to figure out how to use this radio "on the fly."  Thank you Jimmy!

The weather on Swains Island in September is probably pretty similar to the weather on American Samoa.  85° F in the day and 77° F at night with humidity from 70% to 91% on average.  64% chance of light to moderate rain every day and wind in the 7 mph to 20 mph range.  A tropical paradise!

But, there are the ever-present mosquitoes, ticks and sunburn to deal with.  So, my clothing will favor long sleeves, long pants, plenty of sunscreen and DEET for the bugs.

I want to bring back as much of this experience as I can (except in the form of bug bites) so I've acquired a new camera and a tablet computer.  Plenty of memory cards have been purchased so I can shoot photographs until my batteries die.  The camera will also take movies so I should be able to return with some good insights into the day-to-day activities on a major DX'pedition.

My Packing List is pretty extensive.  Early Boy Scout training wants me to be prepared but I don't know if I have enough room in my luggage for all the stuff I've put on the list.  Maybe I just need bigger luggage?

Over the next 4 weeks I hope to find enough time to Post here more insights into the planning that goes into a large operation like this.  Stay tuned!

Tuesday, July 24, 2012

Building a K2AV FCP 160-M Antenna

Tim, K8RRT, after his wind damage and while waiting on his insurance adjuster, decided to improve his 160-M antenna by adding K2AV's FCP (Folded Counterpoise) to his Inverted-L.  The tips and tricks used here were mostly gleaned from others who had previously built this antenna.  The first two images below (with blue borders) are from the description of K2AV's FCP antenna on K2AV's web site HERE.  You can find more info on the antenna including the information on the FCP transformer on that web site.  Click on any image below to see it larger.


Below is a diagram of the spacers Tim used on his FCP.  The brackets ( [ ] ) indicate where the No. 12 wire is bent back and begins another run.  The asterisk ( * ) indicates where the wire ends.  The 3-wire half is shown at the top.  Each half is 33-feet long.  The wire is one continuous run.  "FCP" indicates where the wire is connected to the FCP transformer.  Place the two diagrams below end to end with the "Mid" section of each overlapping as the center to see the full FCP arrangement.

FCP Transformer

[|----|----|----|----|----|----|----|----|----|FCP  
[|----|----|----|----|----|----|----|----|----|
*|----|----|----|----|----|----|----|----|----|

End   1    2    3    4    5    6    7    8   Mid


--|
--|----|----|----|----|----|----|----|----|----|]
--|----|----|----|----|----|----|----|----|----|]

 Mid   1    2    3    4    5    6    7    8   End


One spacer at each end and 8 more spacers in the center make 9 sections between spacers.  For 33-feet that means each spacer should be 3-feet 8-inches (44 inches) from the next.

Spacing the wire 4-inches apart means you need spacers a minimum of 9 inches long on the side with 3 wires and 5 inches long on the 2-wire side.  You should probably make them 10 inches long on the 3-wire side and 6-inches long on the 2-wire side to leave room for putting caps on the ends.  K2AV recommends putting caps on both ends and drilling a small weep hole in the bottom cap.

FCP Spacer Attachment
End spacers should probably be a bit longer for attachment purposes.  We cut the spacers from ½” Schedule 40 PVC.

Here is what we made:

     2 - 12” spacers (End of 3-wire and Center spacers)
     8 - 10” spacers (3-wire spacers)
     8 - 6” spacers (2-wire spacers)
     1 - 8” spacer (End of 2-wire)

3/32” holes were drilled in the spacers for the No. 12 bare wire.  The holes were drilled at slightly different angles to provide some extra tension on the wire.

We cut the No. 12 hard-drawn bare copper to 168-feet.  That is based on 5 lengths of 33-feet each for the counterpoise plus 1 foot for the end interconnect space and 2-feet for connecting to the FCP transformer.

All the spacers were strung on the wire first.  This end will be the unconnected end of the FCP ( * ) and the No. 12 wire was wrapped back on itself at that point.   We then measured 66-feet and that became the end of the 2-wire section.  The No. 12 was bent and re-inserted in the second hole of the 2-wire End spacer.  That wire was then threaded back through all the other spacers 2 at a time.  One of us held one spacer and kept the wire flowing freely while the other pulled the wire through the second spacer. We did this about 10 times but each time the amount of wire being pulled through got less so the process went faster each time.

When we reached the beginning spacer, the No. 12 was bent again and re-inserted in the third hole of the End spacer of the 3-wire section.  The wire was then threaded back through the remaining 3-wire spacers to the Mid spacer.  Measurements were made again and the wire was bent where it came through the Mid spacer leaving 2-feet for attachment to the FCP.

The spacers were then fixed in place by placing a black nylon zip tie (Ty-Rap) diagonally across the spacer.  Before doing that, measurements were again checked to make sure the spacers were evenly spaced at 44 inches.

Tim's installation was similar to the Pole Mounted FCP in the image above.  His center support was a 4x4 post.  His end supports were military surplus fiberglass poles which were placed over a short metal fence post driven in the ground.  The poles were then back-guyed to provide the necessary tension on the FCP.  In the photo below Tim has put one thin PVC in the center of one half of the FCP to give further support.  He will put another white PVC on the other half later.
The full FCP Counterpoise with Fiberglass ends and one PVC center support.

Friday, June 29, 2012

K8RRT Wind Damage


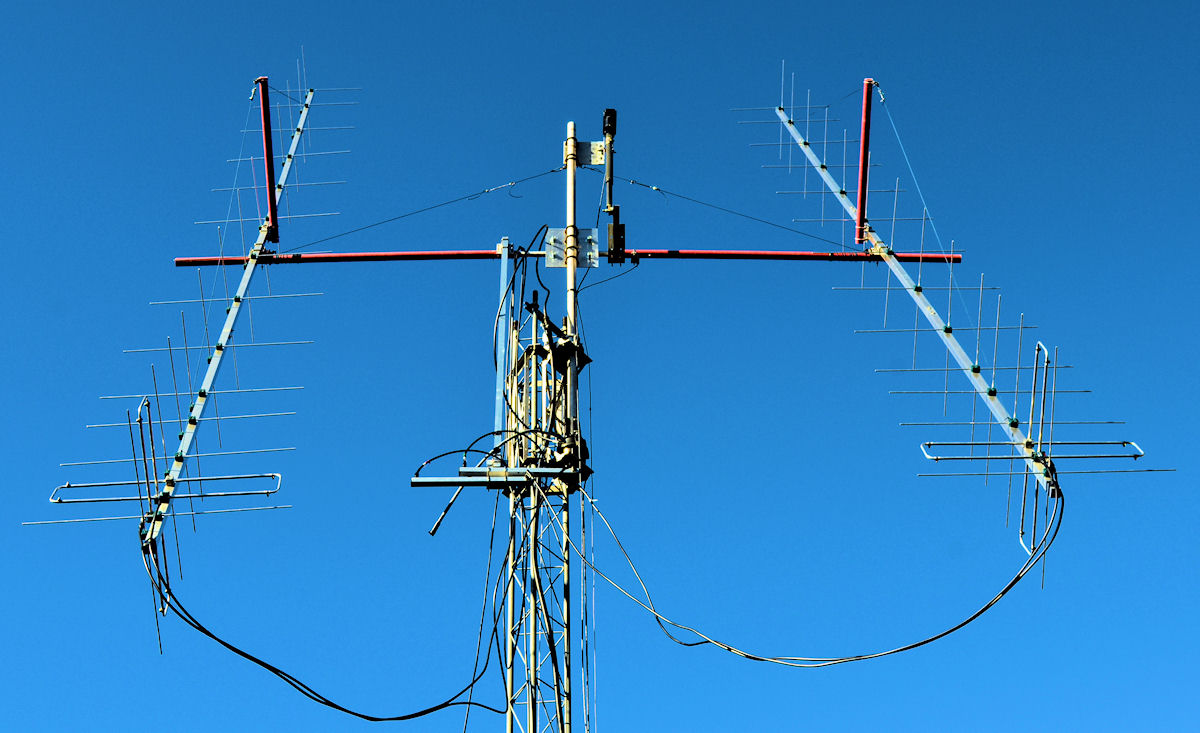
 The big wind storm of June 29th left a major impression on many in this area.  Dwight, W8WDT, lost the antennas on his tower and Bart, WT8V, had a huge tree crash into his house causing major damage.  Tim, K8RRT, was at work and learned that his mast pipe bent over in the wind.  Evelyn and I quickly drove to his QTH to try and get a photo before darkness set in.  We noticed that power was out all over Hurricane, Scott Depot and Teays Valley.  It was not until we hit Thompson Road, where K8RRT lives, that we found the power was on.


As you can see in the above photo, his mast bent over at the top of the tower.  He also lost his 60° Flag antenna.  The fiberglass poles supporting the far end fell over and the center support broke as you can see in the next two photos.  Click on any photo to see it larger, then use either your BACK button or close the pop-up window to return to this page.

As of 11:00 p.m., Appalachian Power's web site is showing over 300,000 in SW West Virginia without power.   23,366 are without power in Putnam County, 72,632 in Kanawha County and 38,918 in Cabell County.  I also received one report that power is out in part of Ravenswood up in Jackson County and Parkersburg (in Wood County) got hit really hard with hail and trees being uprooted.  Channel 3 reported that Yaeger airport in Charleston recorded its 2nd highest wind gust - 77 mph.

Evelyn and I are fine, the generator here is working and letting us watch TV and use the Internet.  Cable TV is out but I happen to still have DSL so I'm still on. 

UPDATE:  Here is a cell phone photo of Dwight, W8WDT's antenna damage.  WOW!  What a shame!

Sunday, June 24, 2012

Cub Scout Wind Direction Indicator

This past week was Day Camp for Cub Scouts in the Pioneer District of the Buckskin Council and it was held at the City Park in Hurricane, WV.  My two grandsons were both attending so "Grandpa" was asked to participate.  They needed someone to teach Electronics and to help them build a Wind Direction Indicator and as Grandpa knows a little about electronics, I was asked to volunteer.

Sounds simple enough - right?  Well, this "project" came about at the last minute.  On Thursday I took an online course to become certified as having been trained in "Youth Protection."  Then it was just Saturday when I received the materials so Sunday was spent in working out the experiments for the "Electronics" class.  Things didn't seem too difficult at this point but that was about to change.

On the first day of camp, one leader had to return home so I was drafted as an assistant to spend 8 hours herding 14 nine and ten year-old's around the camp.  Oh, and the temperature was to hit 90-degrees with equal humidity!  But I managed to successfully steer the group through 8 activity stations from Flag Raising to Flag Lowering with no problems.  I can't tell you how many times I counted 14 "heads."

Tuesday and Wednesday were a blur.  Once I got a look at the "materials," I knew there was just no way I could direct 7 to 10 year-old's to wire the circuit on the right in 40 minutes.  Heck, I couldn't get most hams to do that.  So, it became apparent that I needed to "prepare" the materials.  That meant wiring the LEDs so that all the Cub Scouts needed to do was to connect 5 wires and pound in 4 nails.  I even figured that if they put the wire in a pilot hole, they could make the wiring connection by pounding in the nail.  To the right is a schematic I drew of the circuit.  Click on any photo to see it larger.  Close the pop-up picture window or use your BACK button to return to this page.

For each unit, once I got the 6 separate wires cut to length and stripped to the right dimensions, the paper LED mounting strip cut, and 6 pilot holes drilled in the wood strip, it turned out that I could wire 8 of them per hour working at top speed.  This meant that I had three nights in a row of no more than 4-1/2 hours of sleep!


With help from my wife, Evelyn, and the mother and father of my grandsons, David and Marcie, I was finally able to complete the wiring of the 100th LED module at 11:57 p.m. on Thursday night.   The above photo shows all 100 ready to take to camp.  I was a little depressed because the camp had 135 Scouts signed up for camp.  I really had no idea how I was going to manage not being able to let every boy build his own Wind Direction Indicator since I only had 100 units completed.

The Electronics class consisted of making a battery out of two potatoes to power a digital clock, making batteries out of vinegar, Gatorade and even water.  The finale was to make batteries out of lemons using a galvanized nail and a penny as the electrodes.  The Scouts helped me make up 8 lemon batteries which we connected in two banks of 4 series-connected cells.  The two banks were connected in parallel and that gave enough current to power an LED.  I had made a "shadow box" out of a large cardboard box and put 8 LEDs in the back of the box.  Since Day Camp had a Star Wars theme, I put a picture of the Millenium Falcon in the back of the box with the LEDs leading out of the center of that picture.  I had a board with 8 nails connected to each LED and as I ran the hot lead down the strip of nails, the LEDs would light in order and it looked like the ship was firing a laser cannon!  The Scouts loved it!

On Friday I began instructing the Scouts on building the Wind Direction Indicator.  You can see the final unit on the left.

The Scouts put the 4 white wires into 4 pilot holes that had been pre-drilled by David and marked with circles by my two grandsons.  They then pounded in four 2-inch galvanized nails just enough to keep them steady.

They then formed a ball of aluminum foil around the end of the 7-inch wire and suspended it from a bent piece of bare Floral wire.  Marcie had bent a "dimple" into the center of each wire to serve as the support for the hanging ball.  The Floral wire was then bent and twisted until the ball hung in the center of the nails.  With the positive battery wire connected to the Floral wire (by pressure in the pre-drilled hole), current passed through the Floral wire to the hanging aluminum ball and when the ball touched a nail, the circuit was complete and an LED would light.


The first group consisted of 2 dens with a total of 23 Scouts.  We ran over time by 5 minutes but the end result was that ALL 23 completed their Wind Direction Indicator and they ALL functioned perfectly!  All those late hours seemed to be paying off.  You can see the Scouts working on the indicators in the above photo.

I taught 6 classes with no breaks.  It was a total blur.  However, when the last group came, I asked for the number of boys.  I was told it was 16.  I looked in my box of materials and found that I had 15 units left.  But, I also had my "demo" unit.  So I pulled the wires out of the demo unit and passed out 16 units.  EVERY single Scout who came to my class got to build and take home a Wind Direction Indicator.  WHEW!  What a stroke of luck! 

The pay-off came with the cries of "AWESOME" and "WOW" that issued from these youngsters.  Also, on Friday, one youngster was talking about Protons and Neutrons (something I had mentioned on Thursday in the battery class.)  His mother said he had been talking about those things last night and she felt she was going to have to take a Physics course to keep up with him.  And, at the final session, an 8 year-old walked up to me and announced, "I've been waiting for this ALL DAY!"  His mom said as they left that he had been talking about coming to my session on the Wind Direction Indicator all day - he couldn't wait to come.  She speculated that his dad, a den leader, must have told him about it.

Does it get any better than that?


Thursday, March 15, 2012

Impressive Hail Storm

 This morning we saw some interesting weather.  Lightning was in the area for a long time (well over an hour.)  It seemed like the rolling of thunder would just never quit.  Some strikes were pretty close (less than a second from light to sound) but no damage has been found here.  Then, just before 8 a.m. it started to hail and, it kept hailing for 15 MINUTES!  That's the longest hail storm I can remember.  I grabbed the camera and tried to document some of what I was seeing. 

As you can see on the photo at  the left, some of the hail was over 1/2-inch in diameter.  (Click on any photo to see it larger.)  This photo was taken some 20 minutes after the end of the storm so the size may have diminished a bit.  The temperature is 53-degrees right now an hour after the storm passed, and there is still a surprising amount of the hail visible. 

The concrete streets were partially covered down the center of the lane.  In places where the hail was able to accumulate, it looked like a large winter snow storm had completely covered the ground.  In the photo on the right you can see where the snow had over-filled the gutter and run off the roof in one place (next to the generator), and piled up more than 12-inches deep.  There is a wide shot of the same location below.

 During the storm I was moving from room to room watching from various windows and listening to the hammering the house was taking.  Most impressive!  On the good side, there was no wind associated with this event.  As I write this at 9:10 a.m., the storm seems to have moved on to the East. 


Sunday, February 5, 2012

Improving Confirmations with Logger32

 Logger32 color codes all incoming spots to tell me when there is one I need.  It is Red if the spot is for an all-time New One.  It is Blue if I need it on that particular band for a New One.  If it is a New One on a particular Mode on that band then it is Green.  If it would be a New One on the Mode of the spot, it is Yellow.  Plus, there are more subtle variations.  I have begun to notice that I was paying serious attention to ONLY spots that were Blue since they would increase my Challenge standings.  But that meant I was missing out.  Only CONFIRMED contacts count for most awards.  So, if I saw a Blue spot and I worked that station on that band, subsequent spots for that entity on that band were not Blue but a very Light Blue.  Because that color was so light and did not grab my attention, I tended to overlook those spots.  That meant that if I worked, for example, the Cayman Islands on 17-M back in 2004 but never got the QSL, I was missing opportunities to re-work that country on that band.
So I began poking around in Logger32 and found that I could change the colors for the spots.  Once I knew I could do that, I found a color that stood out as much as possible but was different from the Red or Blue color I had been keying on previously.  I then changed the color coding for spots that met the criteria of "Country Not Confirmed This Band" to that color which I choose to call "Hot Pink."
You can see from the "DX Spots" window above or the "BandMap" window on the right, that this color shows up well.  In the BandMap window you can see I have hovered the mouse over the spot for ZF2LC and the yellow highlighted pop-up says "No LoTW or QSL on 17M."
In order to make this color change, all you need do is to right-click on the DX Spots Window and chose the following:

      Setup  -  Appearance  -  DX Spot highlight colors

Once you release the mouse button, you get the pop-up window shown at the left.  Then, simply click on the color you want to modify and another pop-up window called "Color" will appear.  You can just click on the color you want from one of the color boxes in the Basic Color List.  Or, you can choose a precise color from the color spectrum.  Once you have picked your color, just click on "OK" in the "Color" window and "Apply" in the "Credit/confirmed/worked colors" window.  Now, your spots will begin to appear in the new color format.
Less than 5 minutes after I made this change, I saw a Hot Pink spot for England on 17-M.  I have 200 Confirmed on 17-M but no "Confirmation" from England although I had worked it previously on 17-M in 2004.  It had fallen through the cracks because I never sent for a QSL.  I immediately jumped on that spot and now have a chance to acquire a Confirmation for a band/country that is "missing" from my confirmed list.  NICE!
You can click on any of the photos on this Blog and see a larger image.  Just close that pop-up with the "X" in the upper right-hand corner to return to this Blog.

NOTE:  This Hot Pink color will only show IF you have confirmed the same country on another band/mode and had it APPROVED by ARRL AND you have told Logger32 that country has been approved.  Otherwise, Logger32 will search down the "Worked/confirmed/credited" list on the left searching for the first one that does not meet the description of that color.  So, if you have worked the country before, on this band, on this mode, plus you have a QSL for this country on some other band/mode - then the spot will print in WHITE.  But, if you have told Logger32 that same country has been approved by ARRL, that's when you will get the Hot Pink color.  I know that sounds confusing but Logger32 just checks each description in the list of colors in the descending order before it picks the color to display the spots.